
We have now created the opening formation at count 0 which is set #1. Now we will create the next set by “morphing” or reshaping your formations at set #2. Initially 3D has established a mark time between set #1 and set #2. As we reshape the formation at set #2, 3D will automatically create the transitions to set #2 from set #1.
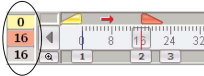
To indicate the count of the next set and the number of counts in the transition from the last set, we will spread the anchors in the Count Track over those counts. Setting the Yellow Anchor at count 0 and the Red Anchor at count 16 will set up the field for editing of the formations at count 16 and create a 16 count transition between count 0 and 16.
Click on Page Tab #2.
The Red Anchor will snap to count 16, leaving the Yellow Anchor at count 0. When advancing the Red Anchor, the performer’s field locations will not appear to change even though we are now looking at count 16. This is because editing has not been done. Performers at count 16 are holding from count 0. In fact, 3D has established a hold to the end of the drill.
To create the formation at set #2, you will be selecting shapes and then using edit tools to reshape them. In this example, our Red Anchor is at count 16 and therefore the shapes we are editing are at count 16. Since the Yellow Anchor is at count 0, the transitions will be created between count 0 and 16. From count 0 to count 16, we will have the two lines Push (or move) forward towards the home sideline.
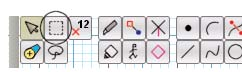
In order to Push the lines, we first need to select the lines on the field. In this example, we will choose a Box Selection tool for that purpose. Select the Box Selection tool from the Tool Palette.
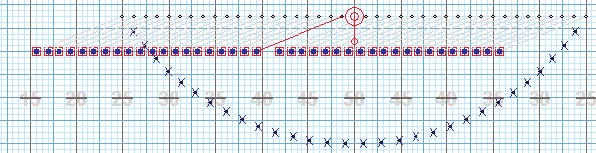
Click above and to the left of the first position of the left line and drag down and to the right until both lines are encompassed within the rectangle you will be creating.

The performers of both lines will be outlined in bold red indicating that the two lines are selected.
Now that we have selected the two lines, we need to choose a tool to manipulate them. Click on the Push tool in the Tool Palette. A Push Tool Control Panel will appear.

Before committing this transition to the file, this would be a good time to experiment with various editing options of the Push Tool Control Panel. Press the [DOWN ARROW] key of the computer keyboard 16 times. This procedure is used to push a shape implementing the down or up arrow keys.
You can drag any editing handle located on each performer in the selected lines to a new location. All selected places will similarly move as well.
Click on the Revert button. The shape will return back to the original location.
In the Stride text box, enter the number “8”. This will cause each position to move a distance at a stride of 8 steps to 5 yards in 16 counts (the number of counts between our Yellow and Red Anchors).

Located on the left side of the Count Track are the Animation Controls. Click on the Play button and the selected line will move forward. When the pointer on the Count Track reaches count 16, the animation will stop.
Click Accept to accept the movement of the selected lines.
Select Save from the File menu.
Post your comment on this topic.